Monday, February 13, 2012

{ Simple Valentines Day Decorations }

People give you lots of advice when you are pregnant: the best food to feed your baby, sleep advice, labor advice, etc. but there are many parts of mothering that you discover when you are on the journey.
One of those things I discovered was how part of being a mother is creating a sacred and special place called a home. This involves decorating, organizing, cleaning, etc. to make a space that is unique to your family and a place that holds meaning for everyone.
I remember watching Dr. Phil's wife many years ago speak about celebrating holidays in her home and how her children loved the traditions of doing this. She wasn't just speaking about decorating for Christmas but about other special days and seasons like St. Patrick's day or a child's birthday. After hearing her speak, I decided I wanted a home like that. One that celebrated throughout the year.

Which brings me to Valentines Day. February is an "especially special" day for our family because my husband and I celebrate our anniversary this month. So its kind of like a month of love for our family. I realized that my children love the decorating and making our home special and so each year I try to find simple and inexpensive ways to make the home festive.
Here are some if the touches I have done to make our home extra special in February.


I bought a package of heart-shaped doilies from The Christmas Tree Shop for $1.00 for 32 and hung them as garlands around the house. Love these and they are so simple! 


Another doily garland in the living room area.
I also used a framed chalk board to spell out LOVE.


I decorated another spot with a framed printable I found here

 Can you tell I love Chalkboards? This is another of many in my house- perfect for writing quotes and messages on.


I tied cute little heart shaped bags to the back of the kids chairs. They are for them to place little love messages to each other in.


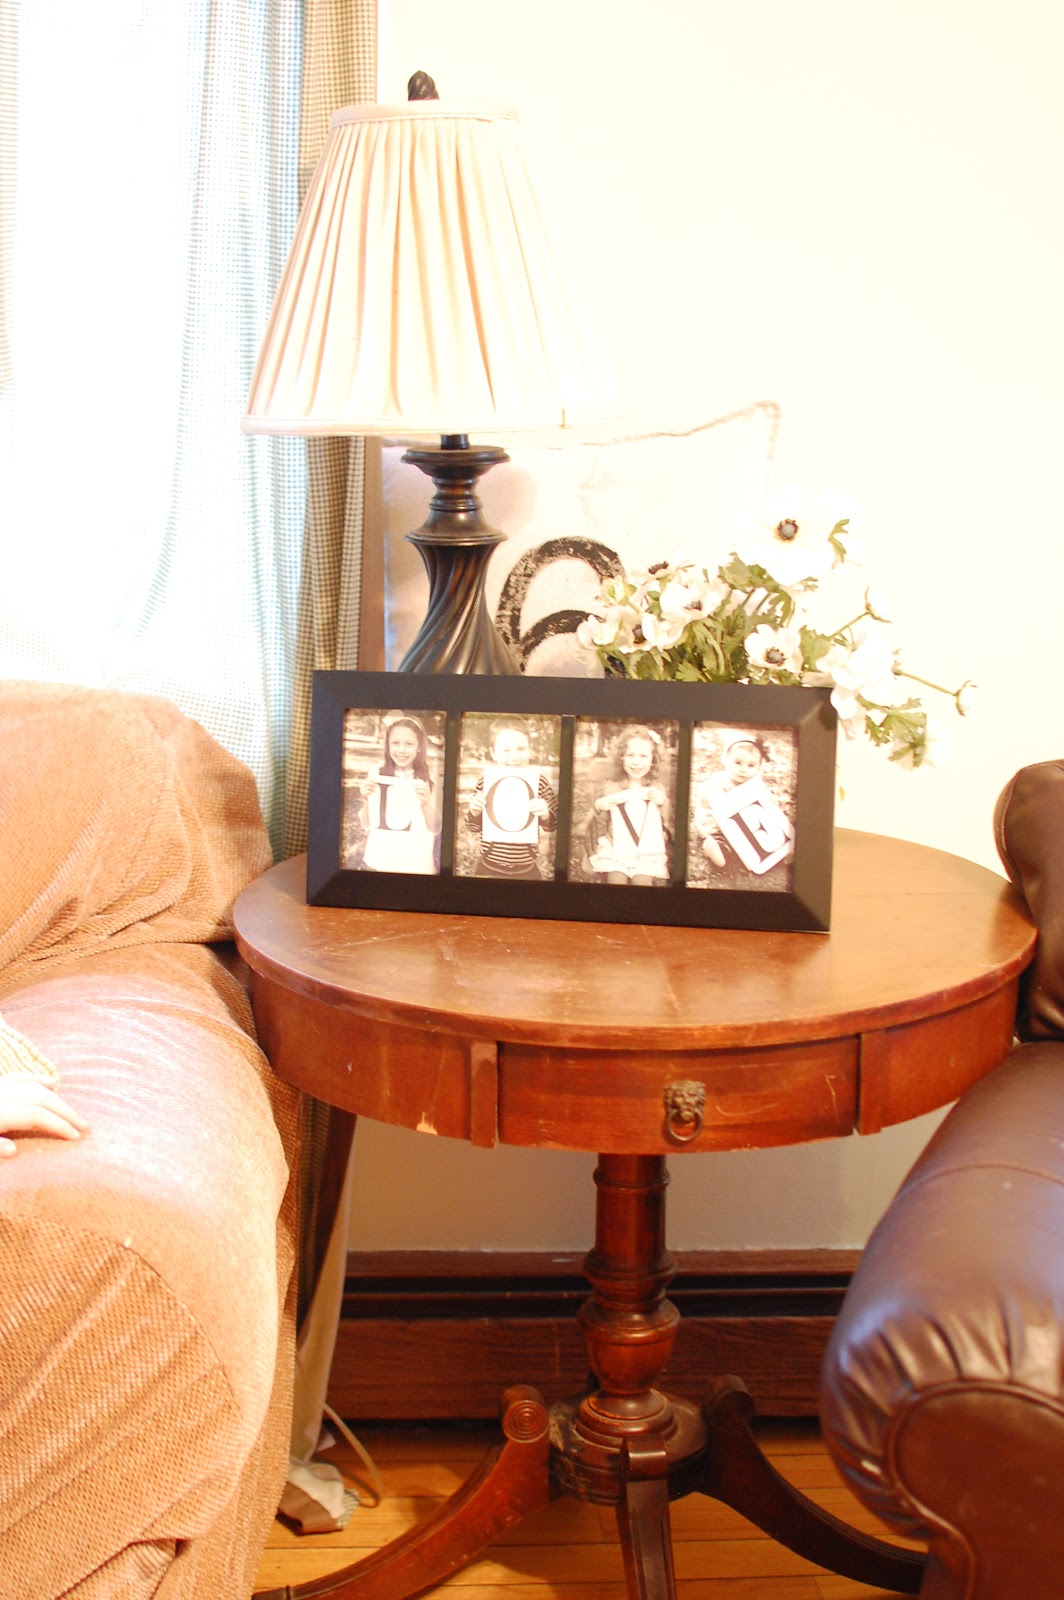
 And lastly, a project I made this week that is so simple. The frame is from Kohls and cost about $8.00 on sale. Perfect for this project I found on Pinterest a while back and loved. I plan on making a JOY and PEACE one for our house as well. This makes a great gift for Grandparents.  You simply print out the letters L O V E and take pictures of your children holding them. For the baby, I taped hers to a book so it would be easy for her to "hold" it. Print them out and place in the frame. Easy Peasy!


{ Photo Valentines }

Every February I find myself trying to balance simplicity with creativity when it comes to the valentines my children bring to school. Stores are full of premade valentines that are inexpensive and cute but I have always prefered homemade valentines because I like the idea of my children taking the time to create something for their friends and family. We usually make them with a combination of construction paper, markers, glue, stickers, glitter and other various art supplies but this year I stumbled on a brillant idea on Pinterest. It was the perfect mix of simplicity and creativity and I love how the valentines turned out.
Take a look.


First take some cute pictures of you kids holding their closed fists out towards the camera. This took a few tries to get the angle right.  I than placed text and "stickers" on the photo using a photodeveloping program. Sent the files off to CVS Photo online and picked them up from the store an hour later. Did I mention this is really easy to do? And inexpensive too.


Than get some lollipops- I used Dum-Dums because they fit well.

 Cut slits in the picture on top and below the fist and insert the lollipop stick.
The kids helped me assemble these.
Super Easy and Super Cute!

Happy Valentine's Day from our family!

Friday, February 10, 2012

{ How do you spell Love? }


With four children ;) 
I put this together to decorate with for Valentine's Day.
I plan on putting it in our bedroom when Valentine's Day is over. 
 I printed out the letters on the computer and took pictures with each child holding one.
For the baby, I taped the letter to a book to make it easier for her to hold.
She's normally my smiler but she had enough to coordinate with keeping her headband on, not crawling away, and holding the paper. 
 I black and whited the photographs to keep them uniform and printed them out at CVS. Place in a frame with a space for 4 pictures. Mine was from Kohls. Isn't it cute?

Thursday, February 9, 2012

Quote for the Week

{ Salty and Sweet Valentine's Treat }

I needed a quick treat to bring to the Valentine's Party that the playgroup that I run was having this morning. I whipped up this cute treat in about 30 minutes time.

You will need:  small pretzels, chocolate chips for melting- I prefer the large size for making candy, some sort of sprinkles, a tablespoon of vegetable oil.

First, melt the chocolate chips in the microwave. Melting chocolate is a simple, easy skill that when done right, is awesome for so many recipes and treats. I place the chips in a glass bowl and add the vegetable oil to them. Than, I melt the chips in the microwave at 15 second intervals, stirring each time. This is the key to not burning the chips. If you just place the chocolate in a bowl and set the microwave for a minute or so, you risk burning the chips. I melt them for 15 seconds, stir, place back in the microwave and melt for 15 more seconds, stir, and repeat until the chocolate is fully melted.


 Than, using two forks, gently dip the pretzels in the chocolate and flip to cover.

Place on a cookie sheet covered with parchment paper. When you have dipped about 8 or so, take a break and sprinkle the sprinkes onto the chocolate covered pretzels.

Than continue dipping the pretzels and repeat the sprinkles until all the chocolate is gone. Allow the chocolate to dry.
Enjoy!!
My kids love these and devoured the leftovers from the party.

(excuse the blurry picture, I was in a bit of a hurry.)

Wednesday, February 1, 2012

{ joy in the little moments }


I cut my son's hair. 
You know its time for your son to have a haircut when he has not one,
but 2 cowlicks in his hair. Yikes!
Yes, it is bright red, and yes, he gets it from me (everyone asked me where the color come from)
even though my hair is much darker now.
Okay, now that you know that, sonny boy needed a haircut desperately so I set up everything in the bathroom the other evening and got to work cutting the overgrown mess on top of his head
while daddy took care of his 3 sisters downstairs.


He is in Kindergarten this year. Full-day Kindergarten. So when he gets home from school its pretty much getting changed into play clothes, snack, homework, playtime and doing his chore which usually is emptying the dishwasher, dinner, cleanup, pjs, teeth  brushed, story, prayers, and sleep.
As you can see, there really isn't much time during the week for much else. 
The schedule is pretty full of just those things. My kids have an early bedtime because their school bus comes so early every morning- 6:45 am!

As we got settled in, old sheet pinned around his neck to keep the hairs off of him as best I could, I realized we hadn't had a chat in a while. 
"How's it going?", I asked him.

And so we talked. 

About school
About friends.
About home.

It was so good to have that time without any distractions.
He's my only son and he growing up so fast and I am so 
grateful for that 30 minutes I had to cut his hair.

And I realized that if I was having his hair cut at a barber, I might miss out
 on this precious moment together with him.


{ framed jewelry art }

So I've kind of been on a "frame" kick recently as I've been decorating my master bedroom.
One of my favorite DIY things was my recreation of something I saw on the Pottery Barn website.

Jewelry Frames

Pottery Barns versions were priced around $30 each and were sold by them last year. 

I took one look and decided that they looked simple enough to make myself.

I bought frames from a local ReStore. (ReStores sell used appliances, furniture, kitchen cabinets, light fixtures, and so much more at reduced prices. The money goes to Habitat for Humanity.)
The total cost for the 4 frames was $2.00.
They were missing the glass and backs which I didn't mind because I planned on discarding those anyways. Because I planned on spray painting them, the color of the frame wasn't important.
I just looked for shapes I liked.

I first spray painted them with Rustoleum base coast spray paint in White and than spray painted them in 2 more coats of Rustoleum Heirloom White.


Than I used hooks with screws at the end and I screwed them into the top of the frame. These are to hang the necklaces on.


 Lastly, I attached Command picture hangers- the frames are very lightweight
without the glass or backings so I felt this was the easiest way to hang them.


Here you can see how they look on the wall.
I love how the wall paint shows through which makes them blend in more against the wall.
I have alot of necklaces so this was a practical yet pretty way to display them.


Related Posts Plugin for WordPress, Blogger...